This time we tackled a trickier project but it turned out pretty neat!
The instructions for this DIY Zoetrope come from: http://www.shareitscience.com/2017/01/diy-zoetrope-animation-steam-project.html
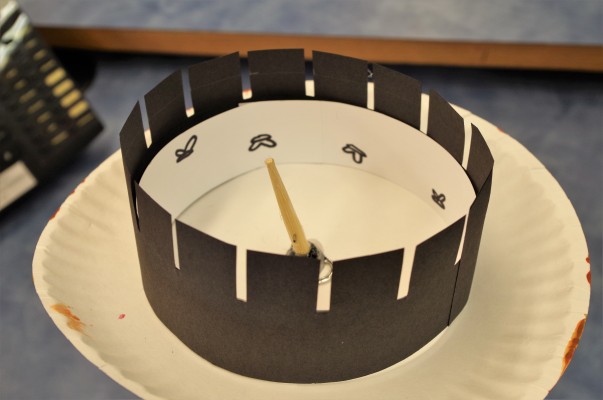
First, you’ll want to cut out your cylinder from the dark paper. The dimensions for the paper are suggestions, you should change the measurements depending on the size of your base. We used a paper plate for the base of our zoetrope.
Cut a strip of the dark paper approx. 2.5 in wide, and 17 in. long. Then using your ruler, measure out the slits. We made ours 1 in apart and 1 in deep. Each slit was 1/8 in wide. Next, tape the strip of paper into a cylinder shape.
Poke a hole in the base of your zoetrope with a pencil or something pointy. Place the paper cylinder on the base. You may need to use tape or glue to keep it in place. Put the pencil through the hole and secure with tape if it is wobbly or loose.
Draw yourself a cartoon on a strip of white paper. The paper should be no wider than the base of the cylinder. Make sure it does not cover any part of the slits.
When you are finished, roll up the cartoon strip and place it down into the cylinder. As you spin the pencil in your hands, look through the slits at the cartoon. It will look like your picture is animated!!
 date, March 14th, is the same as the first three digits of π (3.14).